Exped Phoenix Top Tube Bag
I’ve been meaning to explore making my own bike packing bags since stumbling across Terra Rossa Gear and their frame bags made from off cuts. The second death via hernia of my Exped Synmat over new years provided the perfect opportunity. In the next few days I started to salvage the mat for some ultralight bike packing bag material and also splashed out on a new Nemo Tensor Extreme because, well, I was also waiting for a good excuse to do that as well.
And so, from the ashes of the Exped Synmat UL rises my brand new Exped Phoenix.
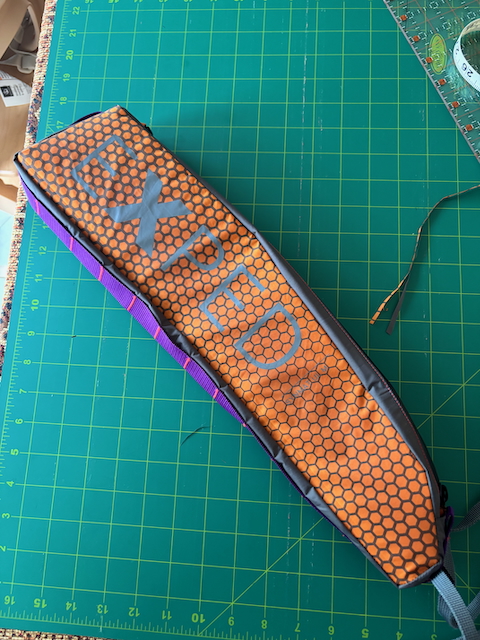 The Exped Phoenix Top Tube Bag
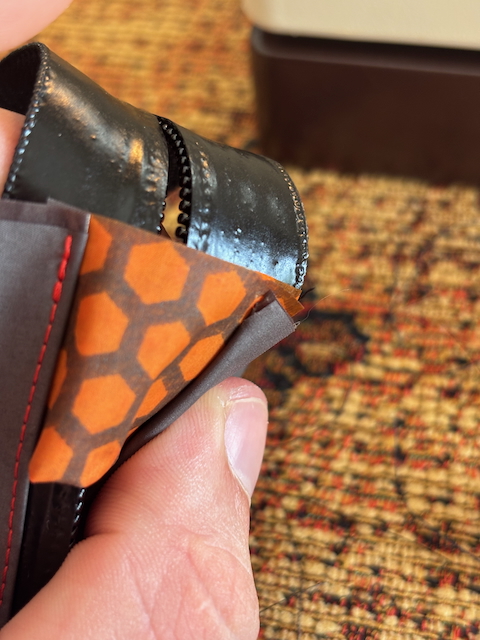
I started the salvage as more of an autopsy to try figure out why the mat had failed as this is a pretty standard problem. Most reports online blamed it on a poor adhesive that didn’t hold up under moisture but that wasn’t the problem here. Multiple of the baffles1 had torn along the entire length. I’m thinking it was actually the summer heat the killed the mat via a two pronged attack; the heat weakened the plastic as well as increased the pressure to rip things in two.
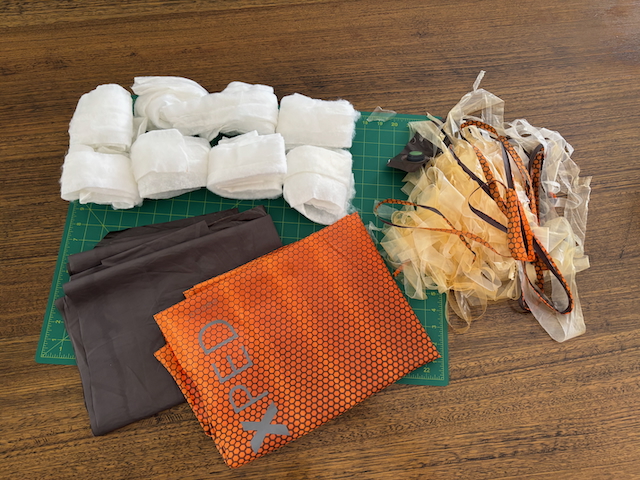 The salvaged materials
Designs for the bag came together pretty quickly as I am still holding my mates Apidura top tube bag hostage after my last bike packing trip around Wisemans Ferry. One additional feature I’ve added is a dedicated phone pocket on the inside of the bag for easy access. The bag dimensions were used to put together a simple template in CAD that never made it out from the 2D plane, printed with and without a seam allowance and finally cut out from some plastic sleeves. The non-seam-allowanced cut outs were used to add some amount of rigidity to the walls as I didn’t want the empty bag to flop around too much. The seam-allowanced template was used to cut out all the panels due to its more complex shape and difficulty finding anything that would draw on the reverse side of the material. Although even with the template this took a couple of attempts because I kept messing up the left-right inside-outside panel pairings.
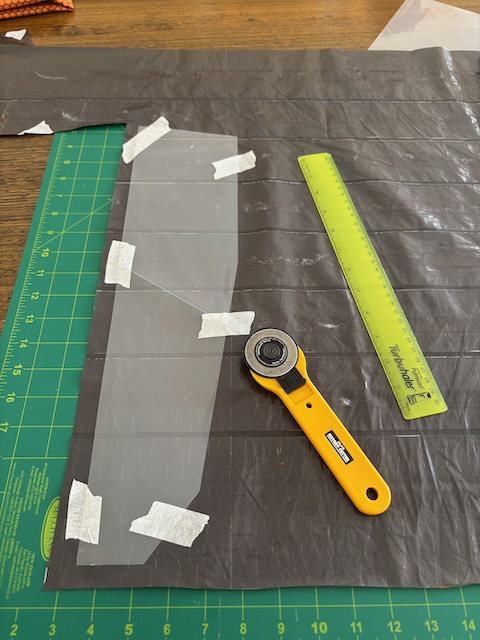 Using the template to cut out the panels.
 All the cut out panels and hardware
This isn’t my first sewing project2 but I had never worked with this kind of technical fabric before so I was a bit worried about how it was going to work. Everyone that seems to be in the know about sewing always talks about thread tension so it was time to figure out how that actually works. I grabbed a few of my failed cutting attempts and started to tweak how the machine was going to be setup for both a normal running stitch and some very short zig zag stitches which will be used to make the daisy chain for mounting. This was a great learning process and will be doing it every time I start with a new project as I’m sure it was the difference between success and failure.
With all the materials cut and a bit more confidence on how the machine and I were going to handle sewing what is essentially a plastic sheet, it was time to make these 2D shapes a bag! I started with the internal pocket as it was the least planned for and I only had one attempt if I was going to be able to keep the Exped logo. Looking back this doesn’t really make sense, I should have practised first but alls well that ends well. I added another extra little touch by lining the pocket lip with a bit of elastic to help hold the pocket taught but I’m not exactly sure its doing anything because the material itself as absolutely zero stretch.
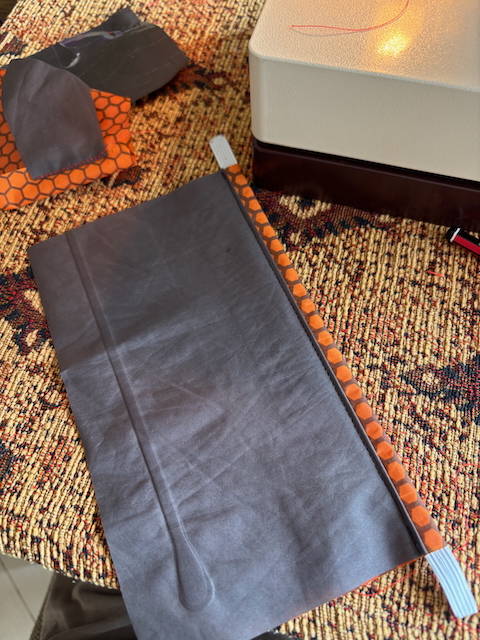 The first piece of the puzzle.
Next was the side panels, these are double layer for a couple of reasons:
- I borrowed a feature from the Apidura bag which is the use of a velcro divider to help keep things in the bag organised. The double layering let me hide the stitching for this on the inside panel.
- I slid the non-seam-allowanced plastic sheet between the two layers to add rigidity to the bag. When sewing these, its important to remember that the front seam has to be sewn last so you can actually get the plastic sheet inside. Unfortunately these panels were a little large and so I ended up sewing through them a couple of times which I think added to the slight wonk that the bag has.
- I thought it was going to look sick to have orange highlight panels and and pocket against the rest of the grey bag.
- I’m also hopefully optimistic that it will increase the strength and durability of the bag considering the material is substantially thinner than your regular bike packing bag.
The drive side panel was finished by attaching the phone pocket. There was a lot of apprehension here when lining it up so that the pocket was actually large enough but once I flipped it over and got to see the completed panel I was super excited about how this bag was going to turn out.
 Assembling the first panel with pocket and velcro strips.
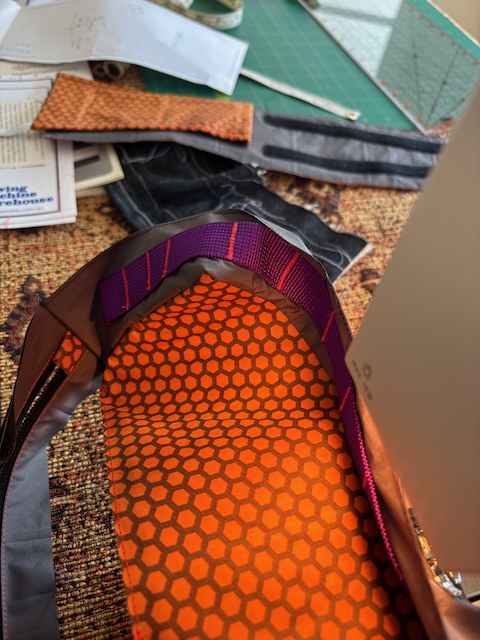
At this point I was still watching lots of different YouTube videos on how to sew the zipper panel and put together the cute little zipper garages so I started on the webbing instead. I’m a big fan of bright, offensive colour combinations so was stoked when the purple webbing turned up and paired so well with my left over orange thread from the afore mentioned chair refurb project and the orange panels. This part of the process was extremely tedious and time consuming. The zigzag stitching got caught a couple of times as the stepper mechanism struggled to pull the small amount of thin fabric with the thick webbing. Unstitching really dense zigzag thread is far from the most enjoyable aspect of sewing. The other thing I was starting to realise at this point was that something didn’t seem quite right with the length of webbing and the size of the bag. At this point, I was aware enough to know that something wasn’t going to be quite right with the geometries but didn’t know enough to figure out what it was.
 The completed bottom webbing with spacing for velcro straps at the front and a thin webbing strip at the back.
I couldn’t avoid the zipper section anymore, and really I was making a bigger fuss of the whole thing than necessary. One thing I did to hedge my bets was to make sure that the final width was going to be wider than the panel needed to be so that I could cut everything to the correct width afterwards. Now that I’m reflecting on the build, I reckon I could have put together this panel in the same was as the chair cushions by simply doubling the desired panel width, folding it in half and running a top stitch along the zipper edge. This would have also had the benefit of making it easier to double wall the panel as there were a couple of points were I missed the second layer but every piece needs a few apprentice marks so you know it was hand made. Figuring out the zipper garages took a bit of patience and trying to keep everything flat while I sewed the two sides together was a bit hard until I realised that the opening the zipper levelled every thing out. After cutting the zipper to width, I sewed the webbing and zipper together to complete the boxing and added a strip of ribbon as binding to clean up the seams.
 The first panel attached to the zipper.
 The zipper garage.
Now for the hard part, turning all these 2D pieces into a 3D bag! First step was realising how off my lengths were going to be, and I didn’t really have enough of the clips to properly figure out how much this was going to bite me. I lined everything up at the front because I was most worried about the phone pocket and zipper and thought there was a bit more flexibility around where the webbing ended up. I made it halfway through the first panel when I realised the panel was on back to front. Time for a break.
 The boxing attached back to front.
Take two, and now we get to figure out what to do with our mismatched lengths. Again I sewed along the bottom half the way around before starting from the front and sewing along the top zipper side. I tried to put the needle on the other side of the foot so the boxing was on top but this didn’t work well so I rolled the whole bag up to keep it out of the way. Where they met I then folded the excess from the bottom webbing panel back underneath itself which was luckily just enough to line the webbing and zipper up. This ended up creating essentially a second zipper garage for the first garage to park into.
 Trying to figure out what to do with the mismatched lengths.
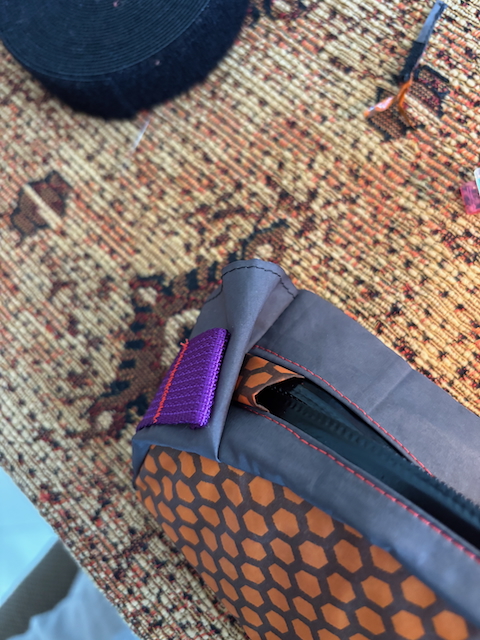 The intended zipper garage tucked into the garage from the extra boxing.
Feeling pretty confident with the outcome, I cracked straight in to the joining the second panel. I swear I had everything lined up exactly the same, but the 2D to 3D mapping and stiff material made this really hard. As I started round the top half it was pretty clear that things weren’t quite lined up giving the bag a kink to the left but I’m not going to let that get me down.
The final reveal of flipping the whole bag inside out was super exciting and had me grinning from ear to ear. I ran straight out and mounted it on the bike with some velcro straps and a repurposed sea to summit strap.
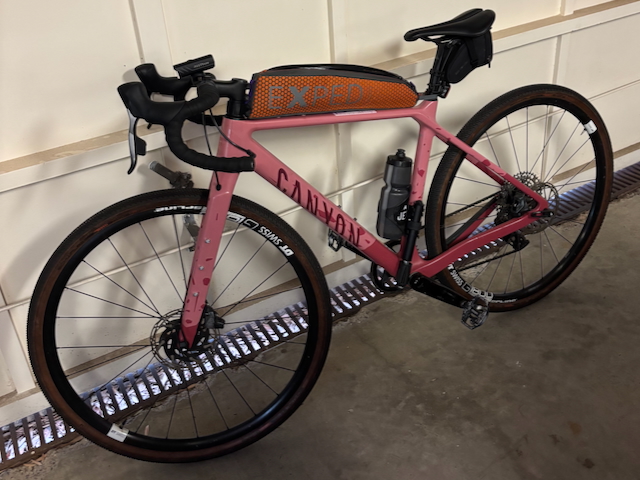 Mounted up and ready to roll!
I was so excited to see how the bag looked that I skipped adding binding to all these seems, but I’ll get round to it at some point.
The recurring motif for the project was to measure twice, cut twice, and still somehow have the dimensions all messed up. I guess I’ve got to go back to school and practice my geometry nets.
All I need to do now is plan another overnight bike packing trip to take this bad boy out for a spin!